
What is a Microsoft Office 365 Flow and What Does it Do?
Microsoft flow helps you work smarter by automating workflows across your apps and services. Flow is part of a powerful business platform
You can do multiple things using Microsoft Flow:-
- Get notification
- Synchronize files
- Collect data
- Automate approvals
- Create multiple sub-site automatically
- Hit “http” service on demand
- The main action words that you will see are “Get”, “List”, “Create”, “Edit”, “delete”, “Send”, “Translate” along with the service it pertains to.
- You can add multiple actions to the workflow and reorder them by simply dragging them where you want them.
Flow Conditions: –
- A condition allows the workflow to perform a task only when something is true.
Flow Triggers: –
- Triggers are the events that start a workflow when they occur.
- Flow can be triggered from an event in any of the services it synchronizes with.
- User can manually trigger based on user action using dedicated flow button and other apps.
- Run flow on a schedule.
Below I have created an example to using flow for
“How to Create sub-sites automatically when inserting an item in list”
Just check figures below.
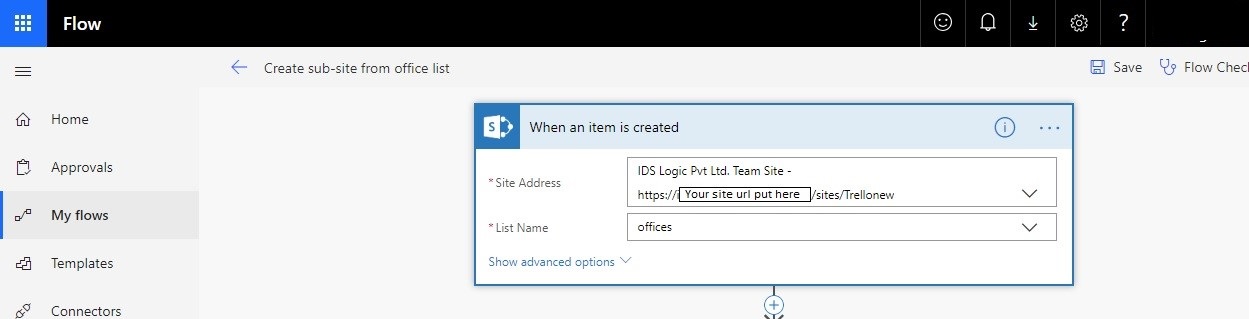
- I have created a list “Office” and attached flow to the list. When an item is created in the list, Flow will create a new sub-site.

2. You have to choose template “When an item is created”. After choosing a template, you will see Site Address field. Please enter your site address in the Site address field, and choose a list name in the “List Name” field dropdown.
3.Then add Get Items panel to get new created item from list.

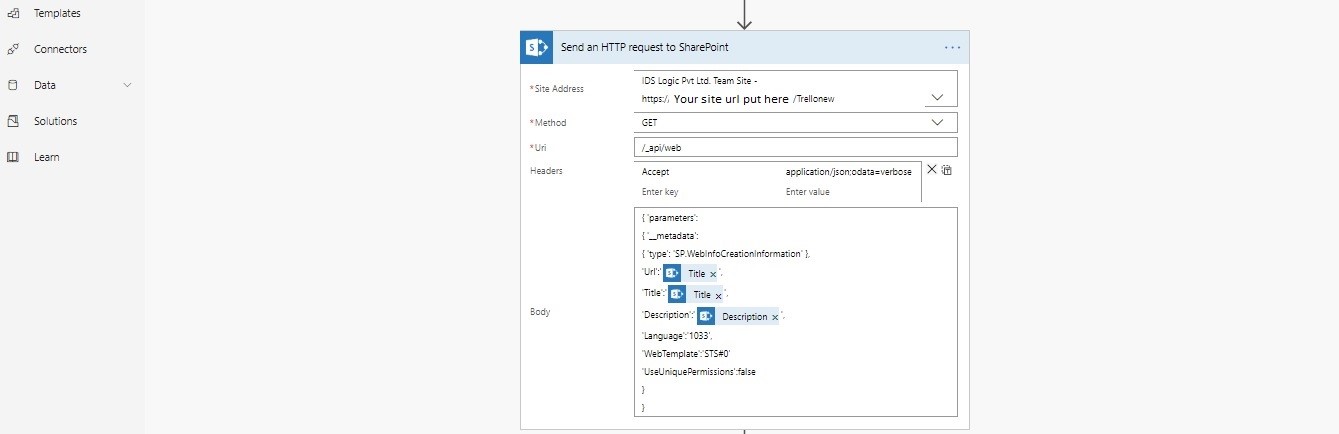
4. After getting the item we will use “Send an HTTP request to SharePoint” panel.
a)-Add site address in the site address field.
b)-Choose “Get” method in Method field.
c)- Add “/_api/web” in the URI. We are using this API to tell SharePoint to add a sub-site in the Site collection.
d)-Add header for post JSON request to HTTP.
e)-Finally, we are going to add JSON Body.
“As you can see, I have mention below JSON body code and figure.”
5- After the above steps, click save button to save Flow against the “Office” list.
6-When you create a new item in the “Office” list, Flow can trigger automatically and create sub-site for the user.
Related Blog: Say Hello to the New Features in SharePoint 2019
Contributed By:
Biswajit Mishra