
How to Set Up an Analytics Module in Sitefinity
In this section, we will show how to set up the Analytics module.
Sitefinity CMS Analytics module is used to track your website traffic and marketing effectiveness. The module consists of various reports and indicators that give you statistics for the visits and the visitors of your website
The web analytics feature of Sitefinity CMS is tightly integrated with Google Analytics in the backend providing the users with all the benefits and features of Google Analytics in the context of the CMS.
The built-in Analytics Module retrieves data from Google Analytics and displays reports for all websites running in your Sitefinity project.
Please Follow These Steps to Set Up the Analytics Module that are Given Below:
Step 1: Go to the Administration >> Modules & Services and check if Analytics module is activated or deactivated. If the Analytics module is deactivated than first activate this module after that follow these steps.
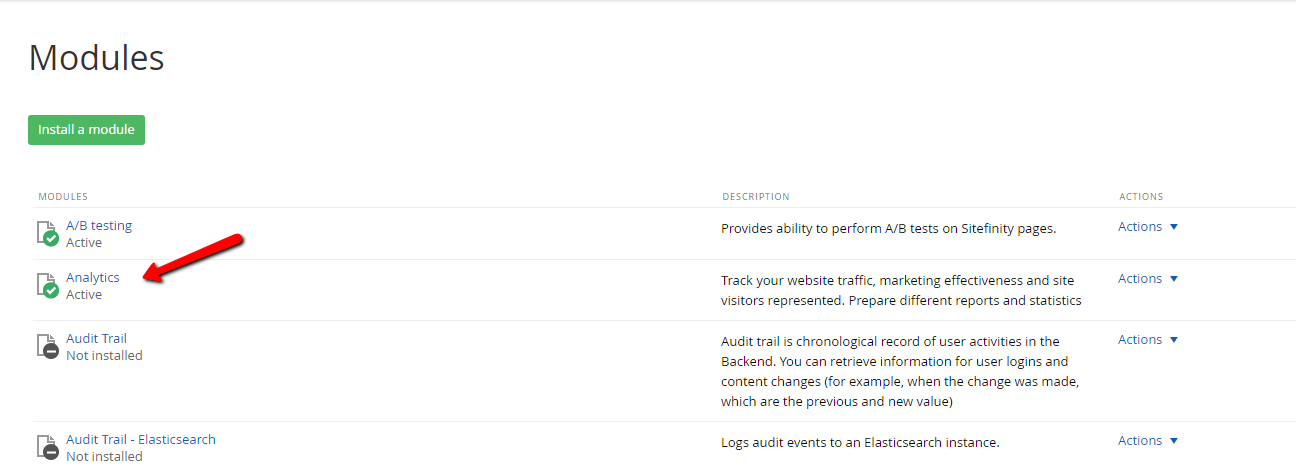
Step 2: Navigate to Marketing » Analytics
Step 3: Click Configure Analytics after the window appears
Note: To perform the initial setup of Analytics, you must register your website in Google Analytics.
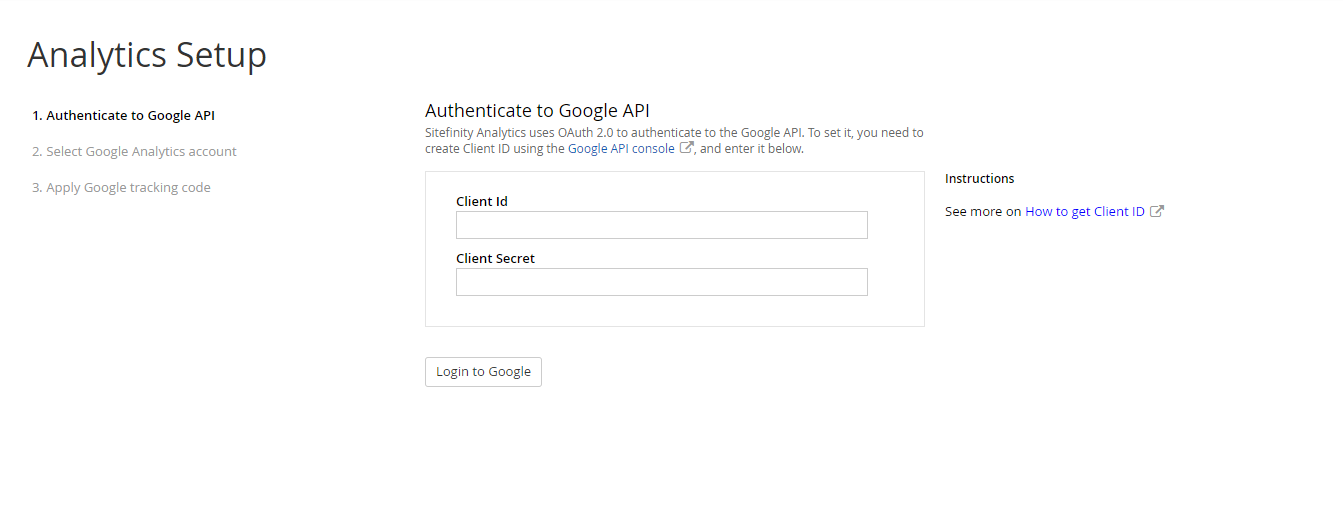
Step 4: Enter the Client ID and Client Secret.
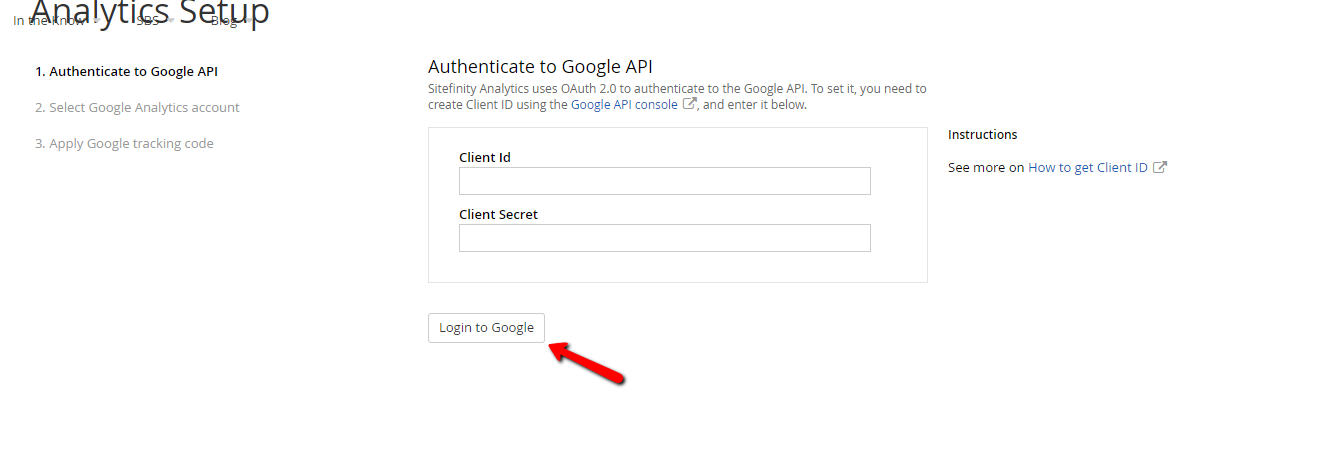
Step 5: Click on Login to Google.
Step 6: Allow the created project to view and manage your Google Analytics data.
Step 7: In Available accounts, select the view that you have created to track this website.
Step 8: In Tracked domains, select the domain of your website.
Step 9: Click Save Settings.
Also Read: How to Make Sitefinity Backend More Secure
Contributed By:
Arunodaya Kumar